Wednesday, February 6, 2013

Garlic x3!

Minced & Confited Garlic
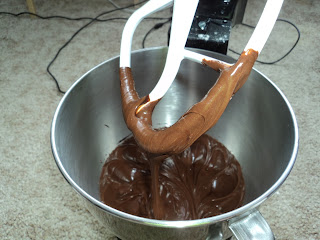

The final products!

This post is slightly longer in coming than I had hoped, yet better late than never, right?

As I'm sure you all have picked up by now, I'm pretty stinkin' lazy and cheap...and a slight food snob; therefore, wanting to make my own minced jarred garlic shouldn't come as a big surprise.

I always use fresh garlic over garlic powder in recipes (garlic powder is a spice not an ingredient) therefore, if I need minced garlic I must choose between peeling gloves of fresh garlic and mincing them myself or buying jars of pre-minced garlic in oil. Now, I used to buy the jars of the pre-minced stuff then I bit into a rock and upon investigating the source found it came from my jar of pre-minced garlic. Granted, it may not have actually been a rock, but rather a dried bit or end of clove; either way it felt like a rock and thus my time with pre-mince garlic was over.

This was a few years ago and I've been using fresh garlic since (which is indeed a superior product), but my laziness and annoyance over sticky garlic fingers slowly built. About a week ago I finally had had enough; I trolled the internet to see if there were any special tricks or unforeseen complications with making pre-minced garlic myself. Great news all, there weren't any that I could find.

No longer do I have to suffer through sticky, stinky garlic fingers; no longer must I exert the massive stores of energy required to pluck a clove of garlic, peel it, and then mince it each time I want to use tasty tasty garlic!

Now, I can spend the 10 or so minutes extreme effort all at once to create a store of minced garlic, saving me wracking, almost unendurable bouts of fatigue each time I require minced garlic. Plus, the amount of minced garlic produced is enough to hold me over for months; thus, allowing me to recover adequately before having to refill my stores of minced garlic.

Citing the aforementioned laziness, I'm not going to come up with anything quite as fun and creative as the previous description for the garlic confit and garlic oil. It's delicious and easy, that's all you need to know.

Now all the work up is out of the way, let's get to the meat of the issue: THE RECIPES!!


Minced Garlic

Ingredients:

  • 6 heads garlic
  • ¼ c. vegetable oil
  • 1 T salt

Directions:

  1. Separate the cloves from each head of garlic
  2. Peel each clove of garlic and reserve them in a plastic prep container (or your equivalent)
  3. If using food processor to mince, cut cloves into smaller pieces to insure even mincing
  4. Finely mince garlic and place into glass jar with sealable lid
  5. Add vegetable oil and mix to combine


Store minced garlic in refrigerator for up to 6 months

**Note** The color is going to look a little paler than what you see in the store, thats ok; it will darken over time. Link to recipe


Garlic Confit

Ingredients:

  • 2 heads garlic
  • Approx. 1 ½ c. olive oil

Directions:

  1. Separate the cloves from each head of garlic
  2. Peel each clove of garlic and place in a small oven-safe container
  3. Cover with 1 inch of olive oil
  4. Place in 250 degree F oven for 90 minutes
  5. Remove cloves from oil; reserve oil as garlic oil
  6. Mash confited cloves and place in seal-able glass jar


Store confited garlic in refrigerator for up to 3 months; oil at room temp for up to 6 months.

Get the recipe here.


That concludes this post. Go out and enjoy the freedom you now possess, being freed from the rigors of garlic!


Word,

-The Fumbling Gourmet


Friday, February 1, 2013

Garlic!!!

Pungent Deliciousness!

This week as been the week of garlic! I made my own minced garlic and jarred it to keep in the fridge. Much better quality and a good deal cheaper. Today I made garlic confit! Tasty good. Not only does it produce a succulent buttery spread, it also creates the most tantalizing garlic flavored olive oil.

I'll get those posts up soon; school and work have hindered progress on this here little blog, but I'm hopeful that will calm down in the next few weeks.

Have a great stinkin' day, e'rrbody

Word,

-The Fumbling Gourmet

Wednesday, January 30, 2013

Baking Mix (Bisquick® Copycat)

This is an easy, cheap alternative to buying pre-made baking mix

The real reason why I ended up with this recipe is a sudden and pervasive desire for pancakes; however, when I went to retrieve my Bisquick® to whip up a batch it was evident I hadn't made pancakes in...well let's just say it had been a while. *Gag*

Realizing my store of pancake mix was bad, which I am sad to say is all I ever used my Bisquick® for (I've pledged to change that now that I can make my own mix, however), I was presented with a difficult quandary: I'm mega-jonesing for pancakes, but I am also way too lazy to go buy any. I did a little internet research and found a copycat recipe that looked very promising.

The recipe I'm posting here is not exactly like the one I found on the interwebs, but it is close enough that I can't take the credit for the bones of the recipe. That honor goes to the folks at recipesecrets.net (The link to the original is here.).

This recipe makes just over 6 cups of baking mix which can be used as a direct substitute for Bisquick® baking mix (which I'm hoping becomes more than just pancakes).
**Update** Oops, completely forgot to post the link to the recipe...my bad.
Here it is!

Baking Mix (Bisquick® Copycat)

Ingredients:

  • 6 cups all-purpose flour
  • 3 T baking powder
  • ¾ tsp. baking soda
  • 2 T powdered sugar
  • 1 ½ tsp. fine salt
  • 9 T canola oil

Directions:

Step 2: Oil added, lots o' lumps
  1. Combine all dry ingredients in bowl of stand mixer; whisk until combined
  2. With mixer on low, drizzle in oil slowly
  3. Mix until lumps are gone (should resemble the texture of wet sand)
  4. Substitute for Bisquick® at a ratio of 1:1; store in airtight container


Step 4: Ready to use!


And that, my friends, is my second recipe post completed!! Albeit, a very simple and short one, but wth it's done nonetheless. Now I have to get ready for class (we're testing the water activity of different types of meat in my Value Added Products lab, wahoo!![I'll totally have to make a post about our project in this class, it's gunna be wicked awesome!])!

Word,

-The Fumbling Gourmet

Monday, January 28, 2013

Malted Milk Ball Cake

Here it is all; my very first recipe post!

As I said before I made this cake for my Mom's birthday. My fiance and I are heading to my parents place later this afternoon to celebrate the birthday and my fiance taking her NCLEX test to become an RN! Wish her luck!

The Finished Product

Om Nom Nom...

Anyhow, after my failure the other day I did a little re-planning and rewriting and came up with a finished product. Baaaaaam!

Well now comes the recipe I suppose. Uh, first I should go over how I'm doing this whole recipe thing; it's a little different than a lot of other places. I'll list the recipe here in the post, but if you don't want to read my post -ndb- I'm including a link to a page that JUST has the recipe. Along with allowing you to avoid my, super-mega-awesome, posts, it will also be a good resource if you need to come back to it.


Malted Milk Cake
INGREDIENTS:
·         Boxed chocolate fudge cake mix (Betty Crocker® Chocolate Fudge)
o   1 ¼ cups water
o   ½ cup vegetable/canola oil
o   3 eggs
·         Malted chocolate frosting
o   ½ cup butter (1 stick), room temp
o   ¼ cup vegetable shortening
o   3 1/2 cup powdered sugar
o   ½  cup milk
o   6 oz bitter sweet chocolate chips
o   ¾ tsp. baking soda
o   1 ½ cups malt powder
o   2 tsp. vanilla extract
·         Malted Milk Balls (Whoppers®)
DIRECTIONS:


Cake
Dah Cakes


  1. Preheat oven to appropriate temperature according to your boxes directions for two 9” pans
  2. Grease pans with cooking spray
  3. Line with parchment circles cut to fit snuggly in pans
  4. Prepare batter according to box directions
  5. After pouring batter into pans grease two more parchment circles and place them, greased side down, onto the batter
  6. Bake cake mix according to your boxes directions
  7. Allow cakes to cool for 5-10 minutes before removing them to a cooling rack to cool completely, approx. 2 hours
  8. Level off the tops of each cake with a long serrated knife

Step 8: Pre-haircut
Step 8: Post-haircut


Frosting
Step 4: Fudgy goodness; Yum!

  1. Combine milk and malt powder in 2 q. saucepan and stir to dissolve
  2. Heat mixture over medium heat until boiling
  3. Remove pan from heat and mix in chocolate, baking soda, and vanilla; stirring until smooth
  4. Allow fudge mixture to cool to room temperature; then add to bowl of stand mixer
  5. Add butter, shortening
  6. Sift in powdered sugar
  7. Beat on medium speed until light and fluffy, avoid beating too long or butter will melt; If need be place frosting in fridge for 10-15 minutes to firm it back up
  8. Beat for 15-20 seconds before frosting if taking the frosting from the fridge


Step 8: Frosting, post-fridge whip-up


Assembly:
1.    Place one cake on a 10” cardboard cake round along with a teaspoon of frosting in the center and placing 4-5 strips of parchment underneath to catch any extra frosting
2.    Add 1/3 of frosting to the cake and smooth into an even layer leaving about a 1” border around the edge
Step 2: FROSTING!
3.    Place the second cake on top of the first and push down lightly until the frosting layer just reaches the edges of the cakes
4.    Place the cake in the fridge for 20-30 minutes to harden the middle layer
5.    Place remaining frosting on top of the second cake and frost the cake by spreading the frosting over the edges of the cake
6.    Smooth the surface of the cake until perfect
Step 6: Before
Step 6:  Juuust started
Step 6: Almost done...!
7.    Cover the top and sides of the cake with the malted milk balls
    8.    Try not to devour the entire thing in one sitting (Ha! Good luck!)
Step 8: Cha-right!

Alright; finished my first recipe post! That wasn't as time consuming as I thought. Which is to say, the delay was 50% having to wait until the celebration was held and the cake eaten and 50% laaaaaazy.

Oh well, it's done; it was incredibly fun; and I have a million more ideas to try!


(Plus, I finished the chili recipe and tested it again today so, barring any gigantic homework assignments, that post should be coming within the next few days!)

Have a great day, ya'll!

Word,

-The Fumbling Gourmet

Friday, January 25, 2013

CAMERA!

I took the plunge everyone. Bought a wicked fancy camera for my recipe tests.

I got an amazing deal, so my pockets aren't too light.

I'll probably be up way too late playing with it. Oh well!

Word,

-The Fumbling Gourmet

Thursday, January 24, 2013

Failure is bittersweet

...ha ha, get it? Cause the cake is chocolate...


Moving right along, I tested the cake this evening and it was a massive failure. Well, maybe not massive, but it still failed. The cake was not bad, slightly uneven but I think I have a solution for that. The biggest failure was the frosting; it was just to runny to stick in the gaps the uneven cake layers made, (and yes there were gaps; the cakes came out shorter than anticipated which pretty much preventing cutting any off to level them, there would have been no cake left!) I didn't even try to put the malted milk balls on the durn thing, considering the frosting was too runny to stick in the cracks I had a pretty sure feeling the malt balls would have dropped and slid right off into a messy, sticky pile.

This failure is bittersweet because I really think I have the solution. I'll be trying a new frosting tomorrow -I'm hoping- with another cake, which will hopefully be a lot less domed.

Well I'm sleepy, sleepy and have class tomorrow. Tata for now.

**Update** Almost forgot. I lost (*cough*prettysureacertainfianceshreddedaccidently*cough*) the edited recipe for the chili. Therefore, I'll have to spend a little time trying to remember what the -eff I did. It came out delicious for sure, but I'll have to wrack my brain and recall what changes I made to the original plan. So the chili post is benched until such a time as I can remember any friggin thing about it.

Word,

-The Fumbling Gourmet


(Now the "Fumbling" part makes sense, doesn't it?)

Wednesday, January 23, 2013

Upcoming Food Tests

Whoop! First update post. This is way too much fun.


Mmk, so the previously mentioned Chili post should, hopefully, be coming today sometime. Just have one class left today and no work; therefore, I'll have plenty of time this afternoon into the evening. I'll have to play around with the layout and format and all that fun stuff since I have a bazillion pictures to sort through and figure out the purttiest layout. Shouldn't take me too long, but considering it's my first one it may take a while and still look like a kindergartner did it. (Secret is: set the expectations low, that way when you BARELY exceed them everyone's still impressed; BAM!)

OK, here is where I tell you what recipes I'll be testing in the near future. All to get your mouth watering, taste-buds pulsing in anticipation, and minds drifting into sweet, supple daydreams. OK, fine it's also so I don't forget what I'm planning on doing. Happy? Jerk...

UPCOMING RECIPE TESTS

  • Homemade Pancake Mix (Bisquick® copycat)
  • Malted Milk Ball Chocolate Cake (For me Mam's birthday)

I hope to test the cake this evening, and if it doesn't suck I'll bring it home this weekend and surprise my Mom.

And now, I'm away to class.....damn.

Word,

-The Fumbling Gourmet